Friday, November 25, 2011

Carrot & Pear Cake (Eggless and Vegan)

When I started baking, I had decided that I won't be using butter (and definitely not in cups and cups) in order to do good to myself, esp to feel good, when I stand in front of the mirror ;)  I also try to use whole wheat flour and avoid or atleast reduce the quantity of all-purpose flour/maida used. Wheat flour is bleached with a substance called Benzoyl peroxide (which is present in hair dyes and is banned in UK china and the European Union. OMG!!) to get white colored Maida. Source : Wikipedia

There are a lot of Carrot Cake recipes over the Web and sure, they all look delicious and tempting! This one caught my attention and I wanted to give it a try. The first time, I made these with an apple, as per the original recipe, just eggless. Simply delicious! Now, I had some pears in my fridge and I thought a pear can be substituted in place of an apple! Sure, they work great!  They are similarly textured and is almost of the same size. I also inserted some walnuts (but of course;) - you can add any nuts - pistachios, pecans or use 1/2 raisins and 1/2 nuts - entirely upto you!

Perfectly moist and full of carrots, this one is a healthy cake that also tastes super-yummy! :) Don't blame me if this cake becomes your tea-time obsession! :)

Carrot and Pear Cake

With the classic CreamCheese frosting!


I Used -

Carrots and Pear

1 cup  Whole-Wheat Pastry flour
1/2 cup Brown Sugar
1/2 cup White Sugar
2 tbsp Flax seeds, freshly ground
6 tbsp Warm Water
1/4 cup Olive Oil
1/4 cup Prune Extract (Or Use another 1/4 cup Oil or 1/4 cup Applesauce)
1/2 tsp Baking Soda.
1/4 tsp salt
1 tsp All-spice powder (use cardamom powder if you don't have all-spice)
2 medium carrots , peeled and grated (amounting to 1 and 1/2 cups)
1 medium pear (peeled and cut into small cubes)
Walnuts - about 8 nos.

Whole Wheat flour


How To -


Preparatory Steps -

  1. Grate Carrots
  2. Cut Pear or Apple
  3. Soak groound Flaxseeds in warm water for 5 minutes then whisk)
  4. Start pre-heating the oven to 180 deg Celcius


Procedure -


  • Combine flaxmeal,  oil, prune extract and the sugars until a bit creamy.
Ground flax seeds

It becomes a bit frothy after whisking with warm water

  • In another bowl, sift the flour, baking soda, salt and all-spice powder.
  • Gradually add to the wet mixture until just combined.
  • Fold in carrots and pear.
  • Mix in coarsely chopped walnuts.
  • Grease a square baking pan with oil or butter (if you don't mind!) and spoon the batter and level it.

Ready to go into the oven

  • Bake at 180 degree Celsius for about 30 minutes or until a toothpick inserted in the center of the cake, comes out clean.

Just out of the oven!

Cooled and turned upside down
Close-up!

  • Let cool and then make pieces.
  • Enjoy as such with a cuppa chai tea, like I did! :)

When you serve to guests, you could make a quick frosting with cheese cake, to make it decadent! You could place a walnut on top of each piece for decoration.

Carrot and Pear Cake with Cream Cheese Frosting


(To make the frosting, I used equal quantities of cream cheese and sugar, 1/4th of that quantity of butter and a few drops of vanilla - whisk them all together until and creamy and well-incorporated...Ummmm....:)

Notes:


  • Do not add more water than the prescribed ground flaxseed-to-water proportion (1 tbsp flax to 3 tbsp warm water). The end result will be sticky dough-like cake and longer hours of baking.The first time, I used flaxseeds, I added extra water and learnt this lesson the hard way! 

  • While grating carrots and particularly, apple or pear, strain extra juice if there's too much and do not add all the juice to the cake. For this reason, I prefer chopping pear or apple into small pieces (in lieu of grating). Best to not grate carrots fine (Use the bigger grater). This is to prevent the cake from turning overly moist.

This is on the way to Bake Fest @ Zesty Palette


and to Khushi's Bake With Your Heart even.

I'm very happy to send this cake to Christmas Party @ Julie's space - Erivum Puliyum


Wednesday, November 16, 2011

Bisi Bela Bath (Bisi Bele Huli Annam) - Karnataka Special - Aromatic Hot Lentil Rice

Bisi Bele Bath is a wonderful mixture of cooked tuvar dal, mashed rice and vegetables in ghee-roasted n ground spices. And Onions! Mini-Onions. Ghee-Roasted :) Coconut - also ghee-roasted! Yes, I beg to differ when I hear someone mention Bisi Bele Bath as an equivalent of Sambar Rice. I agree, it does look like sambar rice, but take a spoonful of BBB and you can't stop! It's just heavenly! :)  Sambar rice is just another everyday food, that's all.  <Sorry, Sambar, I know I come to you more often...bcoz u r easier! >

I have beautiful memories of Bisi Bela Bath. Amma prepares it extremely well and even my ammamma asks her to make it when she comes. Its her kai vaakku :) Her recipe is often sought-after in the family but now, I'm letting the cat out of the bag!  I do not know if I was successful in reproducing that exact taste, but it was somewhere close.

Mini-Onions - The queen of this recipe!

Bisi bela bath has a long list of spices, each of which plays a role in enhancing the taste of this dish. The addition of roasted coconut, ghee-roasted mini-onions, a collection of veggies like potatoes, carrots, beans...

Vegetables, chopped ready

Now, on to this Hot lentil Rice recipe...Some quick pointers -

  1. Mini onions are undoubtedly the *Star* of the recipe. If there aren't enough of them, I don't think it qualifies to be called "Bisi Bela Bath".
  2. Ghee :)  Drool ...
  3. Enormous amounts of cooked and mashed toor dal (lentil)
  4. Lots of veggies - potatoes & carrots are a *must*, but less in numbers, individually, compared to mini-onions.  You can also add some red onions (quartered), especially if there aren't enough of mini-onions.
  5. Mash both rice and cooked dal and add some ghee and mash well together using a potato masher, before mixing with the prepared Bisi Bela Sambar.


What I Used -


Mini Onions - about 25
Potatoes - 2
Carrot -1
Beans - 12
Chayote (Chow-Chow ) - 1 

Rice (Ponni or any normal variety that can get mashed well) - 1and 1/2 cups
Tuvar Dal / Toor Dal - 3 + 1 handfuls  => To be pressure-cooked
Grated Coconut  - 2 handfuls
Ghee - 1 tbsp + 1 tbsp + 2 tbsp
Tamarind - 1 lemon sized ball (or equivalent paste)
Turmeric powder - 1/2 tsp
Sambar powder (Home-made or any good brand) - 2 tsp (I use Ambika's)
Salt - to taste
Vanaspati /Dalda - 2 tbsp

Spices - To Roast and Grind


Dhania (Coriander seeds)  - 1 tbsp
Channa Dal (Kadala paruppu) - 1 tbsp
Red chillies (Dry) - 5 nos.
Cumin seeds (Jeera) - 1 tbsp
Fenugreek (Methi / Mendayam) - 3/4 tsp
Fennel / Saunf (Sombu) -  1 tsp
Clove (Grambu) -3 nos.
Bay leaf -  1
Cinnamon - 1 stick (or 3/4 tsp powder)
Poppy seeds (KasaKasa) - 1/2 tsp
Asafoetida (Hing) - 1/4 tsp
Black pepper corns - 8 nos.
Curry leaves - 2 sticks


How To -


Take a deep pan, heat 1 tsp of ghee and fry all the whole spices listed. Add grated coconut finally and roast until it turns a bit reddish. Take care not to blacken any of the spices or the coconut. Set aside on a bowl/plate and let cool.  Later, grind to a coarse powder.


In the same kadai, pour another teaspoon of ghee and roast mini-onions until they turn a little more pinkish and glossy.

Fry the chopped veggies next.


Add salt, turmeric, sambar powder and tamarind extract. (Soak tamarind in 1 cup warm water and extract the juice, discarding the strands and seeds).  Cook for 6-8 minutes until the raw smell vanishes.


Add the ground powder (of roasted coconut and spices). Mix well and cook for 5 minutes.


Roasted n ground spices
Mash the cooked dal and 3/4 th of it to the boiling sambar. We shall use the remaining 1/4 th of dal with the rice and mix the sambar with it in the final stage (like paruppu sadam and sambar over it, just like in childhood days!)


Cook until you see a frothy layer on top. That's about 7 minutes. Now, the Bisi Bela Sambar is ready. Garnish with fresh coriander leaves(cilantro) if you wish.


Final steps, but very important though - Mash rice well  while adding ghee and some dalda to it. Mix the mashed dal with this rice. Then, add ladlefuls of prepared samber to rice-dal mixture and mix well. Take care not to mash cooked veggies. They should be seen and we should enjoy the crunch they give, while relishing the dish. That's it :)
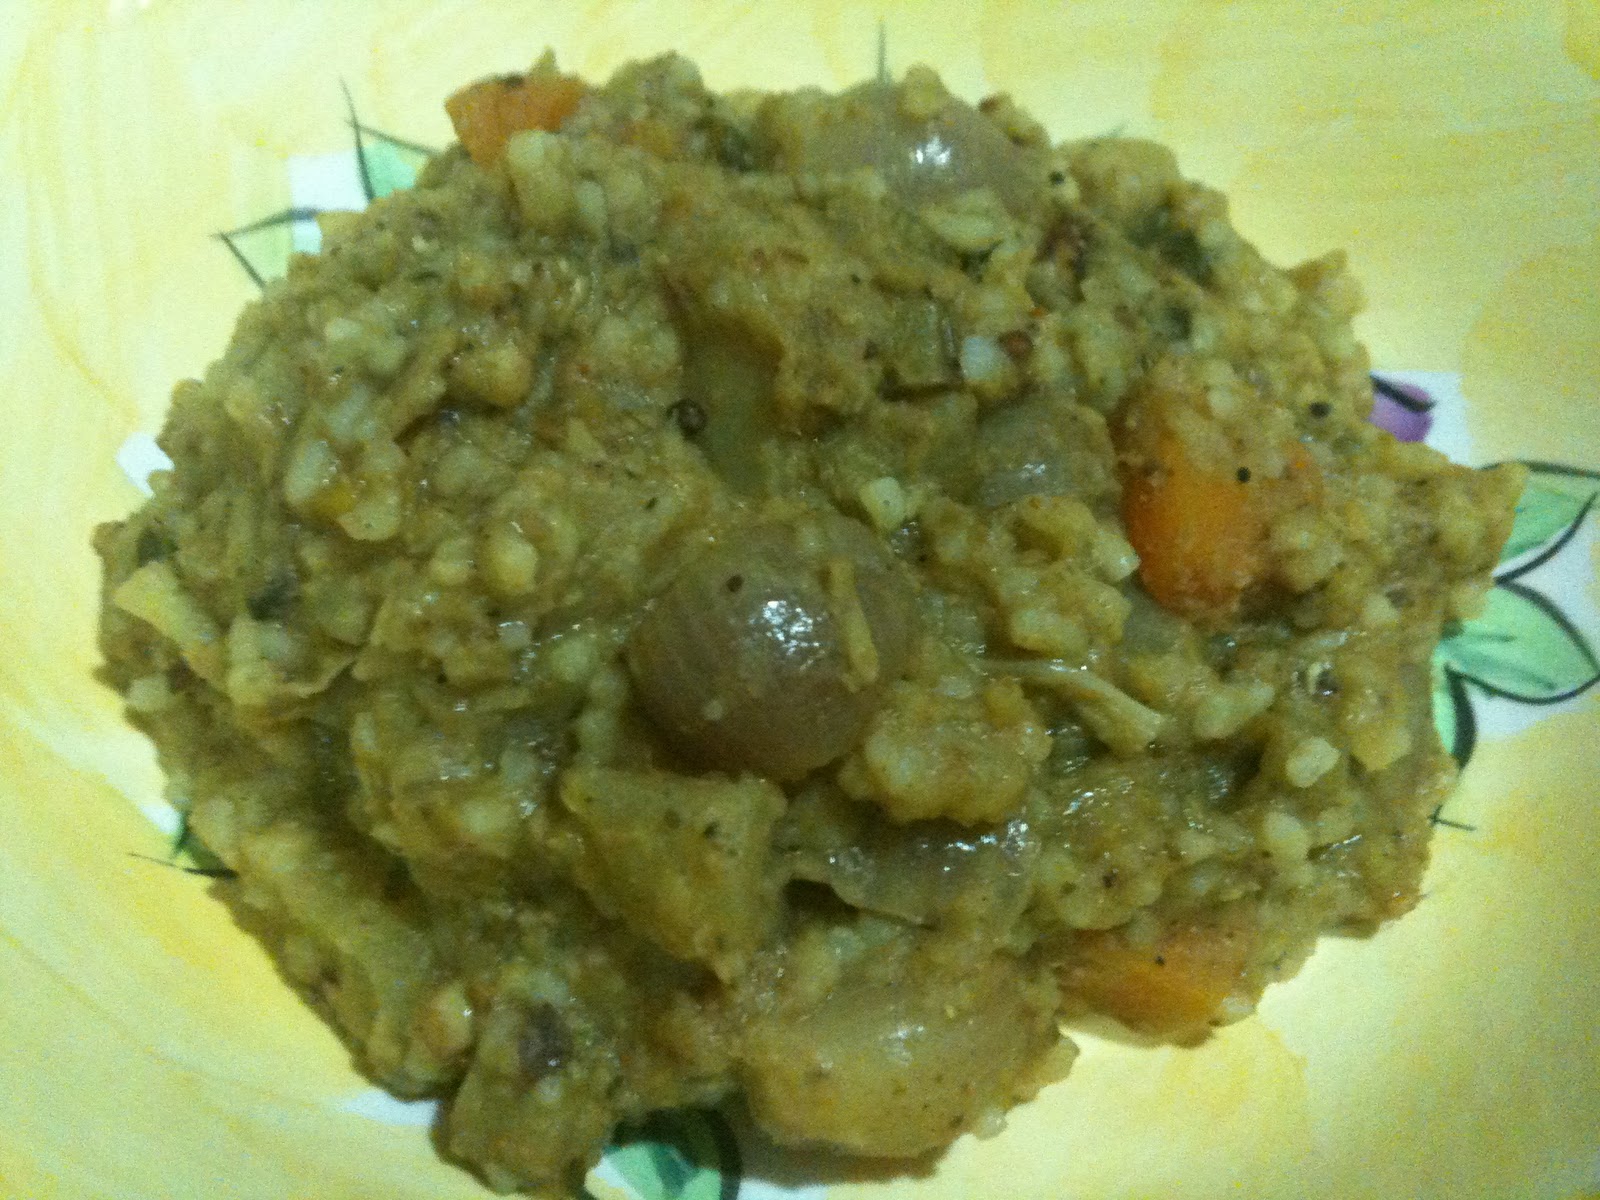
Bisi Bela Bath

Bisi Bela Huli Annam

I served these with deep-fried tapioca papads (Maracheeni appalam)

Tapioca papads
Some Cucumber Raitha would also be good to pair with this Aromatic Hot Lentil Rice.
Bisi Bela Bath definitely makes a satisfying Sunday brunch :) You may even want to take the afternoon nap after this wonderful meal!


Saturday, November 12, 2011

Marbled Choco-Banana Cake (Eggless)

I have always been marveling at marble cakes and their patterns! Now, having tried for myself, I know its so simple ;)

Marble Cake!


I have been awaiting to enjoy home-baked stuff for our weekend breakfasts. There is definitely a special flavor that gets added and makes home-made stuff tastier - probably all the care and anxiousness (for success of a new recipe!) and of course, it's made with lots of love! :)

Bananas cakes never fail me and this one was no exception! Even better, since it has chocolate as well - sumptuous 2-in-1 cake, isn't it?


Marble Chocolate-Banana Loaf Cake


Recipe Adapted From : Cooking Light Magazine, Sept 2003


You Need -


  • All-purpose flour / Maida - 2 cups
  • Baking soda - 3/4 tsp
  • Salt - 2 pinches
  • Bananas (medium sized) - 4
  • Sugar - 1 cup  
    • I think this can be reduced to 3/4 cup, it's sweet, even for a sweet-toothed person like me
    • A better judgement would be to taste the sweetness of the bananas and then decide :) This bulb did not glow earlier when I made it! Anyways, next time :)
  • Butter - 1/4 cup, softened  
    • Bring to room temperature
  • Yogurt (plain, unsweetened) - 1/3 cup  
    • Home-made yogurt/curd works great!
    • Low-fat works too!
  • Semi-sweet chocolate chips - 1/2 cup

How To -


  • Sieve the flour, baking soda and salt together.

  • Cream butter and sugar and then add mashed bananas to the mixture. Use an electric mixer/blender and make into a puree.

  • Add yogurt next and blend again.

  • Stir in the flour mixture and beat at low speed. That's our banana batter.

  • For the chocolate batter, microwave choc-chips for 2 minutes. By now, it's melted. Stir until smooth. Combine 1 cup of banana batter with the melted choc-chips and blend well. Our chocolate batter is ready!

Banana batter ready to be combined with melted choc chips

  • Line your baking tray (I used my loaf pan) and then pour chocolate batter alternately with banana. To marble-ize the cake, swirl around with a knife through both colors of batter. The secret is out! :D

Ready to get baked!


  • Bake in a pre-heated oven at 180 deg C for about 80 minutes...yes, you have to wait quite long! The aroma is just amazing as it gets baked :) A clean bamboo skewer test tells us it's done.  Let cool for 10 minutes in the pan; then remove from pan and let cool completely on the rack.


I like to enjoy these slices as such, or as a sandwich with cream cheese in between! ;)
I can hear you laughing at me ~whats the point in eating brown rice! :)


We enjoyed this with a glass of fresh home-made Minty Mango Smoothie :)  That was a good breakfast!

Sending this to Khushi's event - Bake with your heart and to Vardhini's Bake Fest @Zesty Palette 


Minty Mango Smoothie - Breakfast Drink

Mint has a lot of health benefits in addition to bringing fresh breath and helping in digestion. It relieves cold and flu symptoms. Although consumed in small quantities, the anti-oxidant properties of Pudina helps to protect the body against cancerous cells. So, why not add some fresh mint to ripe mangoes and enjoy delicious smoothies!!!
 

Minty Mango Smoothy


I Used -


2 Mangoes, Ripe (Medium Sized)
About 12 Mint / Pudina Leaves (Washed)
4 tsp White Sugar
3 tsp  Brown Sugar
A drop of Vanilla Essence
2 cups water / Equivalent Ice cubes


How To -


  • Wash Mangoes, Peel the skin and Cut up the juicy flesh into pieces.
  • Add Mango pieces and Mint leaves in an electric blender and pulse about 3 times.
Mango pieces and Mint leaves in the blender

  • Now, add the Sugars plus a drop of Vanilla and blend well until smooth. 
  • Add 1 cup water first and blend well until everything is incorporated together. Taste the smoothie and judge whether it's sweet enough for you and your family.
  • Adjust sugar and add some ice cubes (or a cup of water) and blend well using your juicer. 


VoilĂ ! Your healthy smoothy is ready! :)

So refreshing!

Note - The final consistency should be kinda thick, like that of a milkshake (although, we don't add any milk here).


Cheers!!!

Friday, November 11, 2011

North Indian Kichdi - One-pot meal

I had to come to Singapore amd learn from a North-Indian friend that Kichdi means something totally different in the North!  Did I mention that I have lived all my life in the South :)

For those from South India, its nothing but Rawa Upma with Veggies of your choice. But, to our friends up in the North, it's a delicious medley of rice, dal and sometimes, veggies get added too. This is Pri's comfort food, and now it's mine too :)

North-Indian Kichdi

Some of us may figure out its close resemblance to Pongal, but there are remarkable differences between the two. 1. Only Moongdal for Pongal, Kichdi can be with any dal, typically Toor/Tuvar Dal. 2. No veggies in Pongal 3. The spices are different. And there are many more...you'll see soon :)

Kichdi has become my favorite week-night dinner becoz its super-quick and high in nutritional value - Rice for Carbs, Dal/Lentils for Proteins, Veggies for Vitamins - all in one. I have even tried Kichdi with half brown rice and half white rice and it tastes fantastic! Of course, I love brown rice :)


Yield - for 2 adults
Active Time Spent - 10 minutes

You Need -


  • Oil / Ghee - 1 tsp
  • Jeera/Cumin seeds - 1 tsp
  • Garlic - 3 pods (finely chopped) (Optional)
  • Ginger (finely chopped) - 1 tsp
  • Onion, chopped - 1
  • Green chillies - 4 (chopped) (Adjust to your taste)
  • Tomato, chopped - 1
  • Coriander powder - 2 tsp
  • Jeera + Pepper powder - 3/4 tsp
  • Turmeric powder - 2 pinches
  • Rice - 1 cup 
  • Tuvar Dal - 2 handfuls
  • Salt - to taste (~1 and 1/2 tsp)
  • Water - 4 cups
  •  Veggies of your choice : 
                I have used 
                     Spinach -  1 cup, packed (washed and coarsely chopped)
                     Carrot - 1 (medium sized, cubed)

              Feel free to add -

                    Potatoes, Green peas, French Beans,


Tadka :

Ghee - 1 tsp
Mustard - 1 tsp
Curry leaves - a few


How To -


  • Take your pressure-pan (or any frying pan), heat oil/ghee and do tadka with mustard and curry leaves. Keep aside.

  • Now, heat some more oil/ghee and start adding ingredients, in the order listed, starting from Jeera. Wait for a few minutes while frying garlic and onions for the raw smell to vanish. 
  •  Fry at each stage, for a minute each.
  • Wash and rinse rice and dal (separately) and add to the pan.
  • You need not chop vegetables fine, as they will get mashed up in the pressure cooker eventually.

  • Increase quantity of water if you're using brown rice.

  • Pressure-cook for 4 whistles and wait until all the pressure subsides.


Finish with tadka/ tempering.
Enjoy it hot with potato chips or appalam / papad or just plain!  My husband prefers raitha (cucumber-yogurt dressing) to go with this Kichdi.


Kichdi with Maracheeni Appalam

This is my fav goto-dish on a tired week-night. What's yours?


Monday, November 7, 2011

Chinese Fried rice (Vegan) - The original way

A little background about Chinese Fried Rice: It evolved as a way to use up left-over rice and hence, it's still considered informal (in some parts of China) to serve Fried Rice to guests. There's no strict formula for fried rice and it can be done with whatever veggies (and meat) are available.

I got the recipe from a Chinese colleague (she's a fantastic cook!), so its gotta be as authentic as it is. Here are her tips : 

  1. DO NOT use freshly cooked rice. For best results, use rice that has been sitting in the fridge for atleast a few hours. (If you're using fresh rice, let it cool down by spreading it on a greased plate so that the grains don't stick to each other).
  2. Start with garlic but NO onions.
  3. Add mushrooms, bean sprouts, shredded carrots, celery, peas, beans. Garnish with spring onions.
  4. Spices - only soy sauce, salt and pepper. 

Chinese Fried Rice

Egg is also good to add, but I haven't used any. Knowing me, she specifically emphasized that no Indian spice powders are to be added :)

Here's the recipe, in pictures this time :)

Veggies chopped and ready

A closer look at Bean Sprouts

Bean sprouts are actually from Green Mung beans. When the sprouts become very long, the nutrients in the bean itself are almost reduced to nil, which is why you see only the sprouts. These are extensively used in Asian cuisine and are easily available in super-markets here. They are thick and crunchy and quick to cook! Sprouts are an inexpensive way of obtaining a concentration of vitamins, mineral and enzymes, without the risk of harmful insecticides. 

Heat a little oil in a wok/deep pan and fry garlic

  
Chopped beans

Bean sprouts

Mushrooms

Shredded Carrots

Green peas

Rice , from the fridge


So far...
The veggies are first stir-fried in a wok and then seasoned with soy sauce.
=> Increase heat to high and then add Soy Sauce (~1 tbsp). Quickly stir in cold rice (while heat is on HIGH) and toss with the veggies.


I have used dark soy sauce and hence the dark tone you see here, in the fried rice. You could use light soy sauce too. Start with 1 tablespoon, taste and add more, if you want. Soy sauce generally is very salty (that you hardly need any extra salt) but there are also low-sodium versions available these days. Adjust salt and pepper, after tasting.

Be vigilant to pick the bottle that does not come with MSG aka Ajinomoto. I tend to avoid MSG as much as possible; over the years, it's bad for your health, in many ways.  Most restaurants do add atleast 1/2 teaspoon of Ajinomoto and hence their food tastes remarkably wonderful! :) 

Finally, Garnish with Spring onions/ Green onions.

Spring Onions for garnish


Yummy Chinese Fried Rice - a complete meal!

This is a quick meal, complete by itself! All it takes is about 15 minutes, including time to chop the veggies! :)


LinkWithin

Related Posts Plugin for WordPress, Blogger...