Wednesday, September 28, 2011

Dates and Nuts milkshake (No sugar) - Healthy Breakfast Drink

This is my mom's recipe. She always uses as little ingredients as possible, yet her creations are wonderful. She's also very swift and whips up a complete meal for 4 in just an hour or less. God! Why haven't I inherited this attribute from amma? I console myself, when I learn that a lot of my friends too feel that way and some seniors tell me that it will happen automatically with practice. I hope so.

Let's get on to the recipe...Dates milkshake is absolutely healthy with no added sugar. It makes a refreshing drink on a Saturday afternoon (actually anytime!), when you're exhausted after cleaning up the house!

Dates milkshake


You Need -


Dates (seedless) - 150 g
Warm water - 200 ml 
Milk - 200 ml
Honey ~ 2 tbsp (optional)
Raisins - about 12 (optional)
Cashewnuts - about 12 (optional)

How To -


  • Soak dates in warm water for about 20 minutes. 
  • Strain water and save it in a bowl.
  • Blend the soaked dates in an electric mixer. Add some of the water if required.
  • When it is completely beaten well, add 100 ml milk and blend again.
  • Repeat again with the remaining milk. If too thick, blend with a little water.
  • Blending in steps is important to get a smooth milkshake consistency.
  • Take a sip and taste for sweetness. I did not add sugar as Dates is sweet by itself. You could add 1 to 2 tbsp of honey for extra sweetness. 
  • Soak raisins and cashewnuts in separate bowls with warm water (just enough to soak them) for about 15 minutes. 
  • Blend them well and add to the dates milkshake and blend together once again. 
  • You could save some chopped cashewnuts (without soaking) and add them to the milkshake to give it a crunchy texture.

Serve it chilled, if you prefer that :) I will not add ice cubes though.


Bee hoon (Rice noodles) - Singapore-Indian fusion

Bee hoon is synonymous with Singapore food courts. Of course, they coat it with soy sauce. Now, that's not something commonly found in Indian kitchens. But I love their fried onions on top. Hmmm...Here's what I did...  I bought a packet of Bee hoon from NTUC and it was sitting on the shelf for a month, until one day, when I was inspired to finally make Beehoon, this way!


Bee hoon closely resembles our Instant Rice Sevai, although it is longer and curlier.


What I Used -


Bee hoon - 1 packet (~200 grams)
Oil - 2 tsp
Black mustard seeds - 3/4 tsp
Urad dal - 1 tsp
Channa Dal - 1 tsp
Green chillies - 3 (slit)
Onions - 2
Tomatoes- 3

Turmeric powder - 1/2 tsp
Kitchen King - 1 tsp
Salt ~ 1 tsp (to taste)

To garnish -


Fried Onions
Fresh Coriander


How I Made This -


Cook Beehoon in salted boiling water according to packet instructions. Drain and keep aside.


Take a pan/kadai/wok, heat 2 tsp of oil and pop mustard seeds followed by urad dal and channa dal and fry in medium flame till they turn reddish-brown. Awww...the cruncy channa dal!

Slit green chillies and add chopped onions.

Add chopped tomatoes to this.

Add cooked beehoon and gently mix with the ingredients in the kadai.
Add turmeric, Kitchen King and adjust salt.

Finally add fried onions and garnish with coriander leaves.


This is my customized beehoon :)

A sumptuous one-pot meal indeed!  Feel free to add grated carrots, ghee-roasted cashews and more! :)


Monday, September 26, 2011

Garlic Rice - Made in 15 minutes

Garlic is something that's not part of the traditional Brahmin diet (I personally think that it was banned because it gives you bad breath). However, my grandma often insists that we, the youngsters (her grand children) should include it in our food, as it has amazing properties and health benefits, especially for the heart/cardio-vascular system.

Two years back, I had to eat Garlic rice at an Indonesian restaurant, as there was nothing else vegetarian on their menu! There was no Paneer-Butter Masala or anything spicy to go with it and I grabbed for a bottle for chilly sauce :( That was my first time with Garlic rice. However, I loved it and it's definitely because of the roasted garlic. (What else could be in it? Hahaha :D)

Nowadays, I make Garlic rice quite frequently at home, especially when I make a grand sabji/ side dish to go with it. My hubby loves garlic and I do include good amounts of garlic in our diet.

I concocted the recipe and it is obviously Indianized...

What I Used -

Garlic rice - prep

Garlic - 1 bulb (10 cloves)
Ghee / Clarified butter - 1 tsp + 1 tsp (Unsalted butter works too)
Cumin seeds/ Jeera - 1 tsp
Basmati rice - 1 1/2 cups
Onions (finely chopped ) - 1 medium (optional)
Salt - to taste
Cashewnuts - about 12
Fresh coriander - to garnish

How I Made It -


  • Wash, Rinse and then Soak Basmati rice in water for 10 minutes.
  • Meanwhile, chop garlic into fine pieces. Chop an onion if you like to add it. You could omit onion if you feel that Garlic should be the star of the recipe!
  • Take a pan, melt ghee and roast cashewnuts and keep aside. 
 
    • Take the same pan, melt 1 tsp ghee and add jeera/cumin seeds and spread the ghee to the sides of the pan. 
    • Add finely chopped garlic and let it get roasted well. You know it's done when you get the aroma :) Take care not to burn them.

    • Strain water from the rice and add rice to the pan and fry it for 3 minutes with garlic, jeera and ghee.
    • Switch off the gas.
    • Transfer to your your electric rice cooker/pressure cooker and cook until done (2 whistles sufficient).
    • Garnish with ghee-roasted cashewnuts. Optionally, you may add finely chopped fresh coriander. 

      Garlic fried Rice

      Serve with a North-Indian gravy like Paneer-Butter Masala or Palak Paneer or Malai Beans Sabji


      Beans -Paneer Malai Sabji (French Beans and Indian Cottage Cheese in Creamy gravy)

      This is a wonderful way to include French beans in your diet. Who doesn't like to eat a creamy gravy with soft cottage-cheese cubes in it?

      I learnt this recipe from Geetha chithi and immediately tried it. Loved it and so did my hubby, who doesn't eat beans thuvaran or anything with Beans as the major veg. This is simple to make and tastes yummilicious :) It's also different in that, this sabji does not need the ubiquitous tomato-onion base that most North-Indian gravies come with.

      This post has been pending for a long time and now, when a friend of mine asked for some easy North-Indian style recipes to whip up quickly, I am sending this one.

      Beans-Paneer Malai Sabji with Garlic Rice


      Time - 25 minutes
      Yield - 2 to 3 adults

      You Need -


      French Beans - about 15 (chopped into 1" pieces)
      Paneer cubes - 150 g
      Potatoes - 1 medium (optional, I didn't add any)

      Set A -

      Turmeric powder - 1/2 tsp
      Dhania/Coriander powder - 1 tsp
      Jeera/Cumin powder - 3/4 tsp
      Green chillies (slit) - 2
      Hing/Asafoetida - a pinch
      Red chilli powder - 3/4 tsp (Adjust according to your spice tolerance level)
      Salt - to taste
      Sugar - 1/2 tsp
      Fresh Cream or Malai - 5 tbsp


      Nestle Cream works too.

      To Temper -

      Oil - 2 tsp
      Whole Jeera - 1 tsp

      To garnish -
      Fresh Coriander leaves

      How To -


      • Take a kadai, heat 1 tsp oil and allow jeera to splutter. Try to spread the oil all around the sides of the pan.
      • Add slit green chillies, beans, thawed paneer cubes (and potato, if you would like to) and all the spices from Set A along with fresh cream, in the quantities mentioned.
      • Mix well and cover the kadai with a lid completely. This is to allow the veg to get cooked, plus get the creamy flavor infused in it in a lovely way :) Please turn the gas mark to Sim/Low.
      • After 8-10 minutes, open the lid, the cream would have melted and the beans is now well-cooked.
      • Check for salt and spice levels.
      • If the veggies do not come together with the gravy, sprinkle some rice flour (~ 2 tsp) while stirring simultaneously. Rice flour binds them all together and the cream now coats the veggies uniformly. Do not add too much of rice flour as it will spoil the rich taste that malai (cream) lends to the gravy.
      • Garnish with finely chopped coriander leaves.

      I served this sabji with Garlic rice and we both liked it :)


      Healthy Minestrone Soup - Vegetarian

      If you love Italian food, if you're a fan of Olive Garden, you're sure to love Minestrone Soup. It's very flexible in that you can add whatever veggies you have in hand, just add macaroni cooked al dente and don't forget the red beans and/or white beans. Very healthy and delicious. Bon Appetit!

      Vegetarian Minestrone Soup


      What I Used -


      Elbow Macaroni - 2 handfuls
      Red Kidney beans / Rajma - 2 handfuls (Soak overnight with triple the volume of water)
      Olive Oil - 2 tsp
      Red Onion - 1
      Garlic - 2 cloves
      Carrot - 1
      Frozen Mixed vegetables (Beans, Peas, Corn and it had carrots of course!) - 2 handfuls
      Celery - 4 stalks (chopped)
      Ripe Tomatoes - 4
      Mixed Italian herbs (dried) - 1 tbsp
      Ground Black Pepper - 1 tsp
      Salt - to taste (~ 3/4 tsp + 3/4 tsp)
      Water - as required


      Feel free to add -

      Navy beans/White beans - a handful or 2
      Potato -1 (small cubes)
      Zucchini -1 (half lengthwise and slice)
      Bell pepper/capsicum - 1 (diced)
      Baby spinach (finely chopped)


      How I Made Minestrone Soup -


      • In a large pot (Small pressure cooker pan works for me! ), sauté chopped onions and garlic in olive oil for 3 minutes on medium flame. 
      • When the onions are a little softer, add celery, carrots, beans, peas and corn  (all chopped vegegies) and sauté for 2 minutes. 
      • Finely chop 1 tomato and add to the pan.
      • Extract the juice of 3 tomatoes in a blender and add to the pan.
      • Add the soaked Red kidney beans, salt, pepper, Italian herbs and pour about 1 1/2 to2 cups of water.
      • Pressure cook for 3 whistles and switch off. 
        • If you do not have a pressure-cooker, use a slow cooker, so that the flavors evolve and mix well.

      • In the mean time, cook pasta (Elbow macaroni or other) in salted water until al dente. Don't overcook the pasta. This is precisely why we did not add the pasta to the pressure-cooker!

      • Add the cooked pasta to the veggies sauce and heat on medium flame for 3-5 minutes (Need not boil). 
      Minestrone Soup

      Serve your minestrone soup with some fresh Garlic bread :)

      Variation : You could use alphabet-shaped pasta and your kids can have some fun while they eat nutritious food!

      This is my entry to Soups and Salads Mela hosted by Srivalli and Global Food Festival at Sizzling Tastebuds

      Wednesday, September 7, 2011

      Manga pachadi (Raw Mango Sweet Pachadi)

      This is a semi-sweet, semi-sour dish with a pinch of spice and that makes it different and special :) I love the way amma makes Manga Pachadi and tried it all by myself, following her recipe. It was absolutely yummy and I felt so nostalgic :) Her way of cooking is very healthy and she hasn't included coconut in this recipe. Of course, you can add ground coconut, if you like!


      What She Uses -

      • Raw mango - 2
      • Jaggery - 1/3 cup
      • Green chillies - 2
      • Turmeric powder - 1/4 tsp
      • Salt - a pinch
      • Rice flour - 1 tbsp (optional, avoid if possible) 
      To Temper -
      • Mustard - 1 tsp
      • Dry Red chilly -1
      • Oil - 1/2 tsp
      • Curry leaves (optional) - a few


      How To -

      • Slice mango pieces and cook with sufficient water, adding salt and turmeric. 


      • Slit green chillies and add to the pan.
      • Watch out if the water gets drained and add a little more water. Simmer the flame.
      • Once the mangoes are cooked, add jagery pieces and let boil.
      • Wait for a good consistency to be reached. If the mixture is runny, mix rice flour with water and add to the pan. This helps to thicken the mixture. But the pachadi tastes lovely if you do not add any rice flour.
      • Temper with black mustard seeds (கடுகு), 1 red chilly and a few curry leaves in oil. 
      Maanga Pachadi / Raw mango pachadi

      Enjoy :) 


      Sunday, September 4, 2011

      Medhu Vada / Ulundu Vadai (Spicy Indian Doughnut) - With Tips for Beginners!

      This is the classic vada that Indians make frequently. It is softer than its protein packed counterpart , the Masala Vadai and hence can easily be transformed into Dahi vada or Sambar Vada.

      Vada and Pongal is a classic breakfast set combination found in most South-Indian restaurants.

      Medhu vadai is made along with payasam aka kheer on many festive occasions for a grand feast at home! 

      Medhu Vada / Ulundu Vadai


      Dedicating this post to my sister, who is a fanatic Vada fan and can survive on just Vadas!

      Ok, lemme get to the recipe now...

      Ingredients -

      • Urad dal (Ulundu/ உளுந்து) - 2 cups
      • Green chillies - 7 or 8 (adjust to your taste)
      • Ginger - 2 tbsp (finely chopped)
      • Curry leaves - 2 stalks
      • Hing/ Asafoetida (பெருங்காயம்) - a pinch or two (optional)
      • Salt - 1 1/2 tsp
      • Oil - to fry

      Method -

      • Wash and rinse Urad dal in water twice, remove impurities, if any and then soak dal for atleast an hour.
      • Strain off water and then grind the dal with salt into a fine paste.
      • Mix in finely chopped ginger and green chillies. Tear curry leaves and add to the paste. Add asafoetida, if you like.
      • Take a Ziplock bag or any such material and apply oil on the surface. Traditionally, amma uses banana-leaf :)
      • Then, take some dough and make it doughnut-shaped and carefully, slid it into a kadai with hot oil.
      • Tip :

        Drop a spoonful of dough into hot oil and then, make a hole using the back of a stainless steel spoon/fork and rotating it for 30 seconds in oil to make a hole :) That works well for beginners :)
      • Once the vadai turns golden colored, remove it with a slotted spoon and drain the excess oil on kitchen-tissues. 


      Vadai and Pal Payasam


      Relish your vadais hot with any chutney :)


      Saturday, September 3, 2011

      Spinach rice (Palak rice)

      This is a variation from the usual Coriander rice or Mint/Pudina rice that's popular in the Indian kitchens. Here, spinach is blended with spices and mixed with rice and it's a really good way to make your kids include spinach in their diet. Make it richer by grinding coconut and cashewnuts with the spinach paste ...Wah!!!

      This does not take more than 30 minutes to complete, so you can make this for a weekday dinner when you want something healthy, quick and filling! It's also ideal to pack in a lunchbox!

      Spinach Rice

      What You Need -


      • Rice, preferably Basmati - 1.5 cups
      • Spinach - 2 bunches
      • Green chillies - 4 nos
      • Onion, chopped - 1 big or 2 small  (Sambar onions (very small ones) taste better)
      • Tomatoes - 3 (chopped)
      • Coconut (grated) - 4 to 5 tbsp
      • Cashewnuts - 12 + 6
      • Home-made Curry powder - 1 1/2 tsp
      • Biriyani leaf - 1
      • Cinnamon - 1/2 stick, powdered
      • Pulao powder - 1 tsp (optional)
      • Salt - to taste
      • Oil - 2 tsp
      • Ghee - 1 tsp

      How To -

      • Cook spinach in boiling water and let cool. Strain off water.


      • Make it into a paste by blending along with cashewnuts, coconut and curry powder.


      • Take a kadai, fry biriyani leaf in oil and then add powdered cinnamon. Add pulao masala if you like.
      • Add slit green chillies, chopped onions and fry for 3 mins. Then goes in the tomatoes.


      • Mix in the prepared spinach paste to the kadai and cook until the raw smell vanishes.


      • Add cooked basmati rice and mix gently. Add salt.


      • Garnish with ghee-roasted cashewnuts and fresh cilantro/coriander leaves.


      Serve with Onion-Tomato Raitha and/or Chips/Vadam :)


      Thursday, September 1, 2011

      Uppu/Ulundu Kozhakattai ( Steamed Modak made of Urad dal)

      As a sequel to Sweet Kozhakattai posted earlier, here is Ulundu Kozhakattai, which is for those who don't love sweets.

      Uppu/Ulundu kozhakattai (Urad dal Modak)


      Ingredients :


      Urad dal - 1/2 cup
      Green chillies- 4
      Coconut (grated) - 1/2 cup 
      Hing/ Asafoetida - a pinch
      Salt - 1/2 tsp (adjust to taste)

      Method :


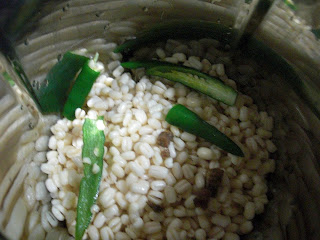
      Soak Urad dal for 2 hours. Grind with green chillies, hing, salt and coconut.


      Steam-cook as such.


      Allow to cool, then divide into 12 even-sized modak fillings, as shown. Hold the steamed urad mixture between your fist to get the shape.


      Make the outer covering as given in Sweet Kozhakattai recipe. Again, apply oil on your palms to make sure the rice flour mixture does not stick to your hands and you can make a smooth covering for the modaks.
      Follow the same procedure and use this urad dal filling. Only the shape and the filling-ingredients differ, the method is pretty much alike.


      Here are the modaks, ready to eat :)


      Enjoy! :) This also makes a great breakfast menu, however requires about an hour for the modaks to be ready!

      Sweet Kozhukattai (Modak/ Modagam) - Steamed dumplings with sweetened coconut filling

      Today is Vinayaga Chaturthi, the Hindu festival for Lord Ganesha, who is considered superior to all Gods. Ganesh Chaturthi is celebrated widely all over India. Kozhukattai or Modak is the main sweet dish made for the festival and offered to God after chanting mantras. It is either steam-cooked or fried. Here is the recipe for the steamed version.

      Sweet/ Vella Kozhukattai or Modagam - Steamed


      Yield : Makes about 12 modaks


      Ingredients:


      For the outer covering:

      Rice flour - 1 cup
      Water - 2 cups
      Oil - 1 tsp


      For the sweet filling (called as  "poornam"):


      Jaggery (powdered) - 1/2 cup   

      (If you do not get jaggery where you live, you could substitute with brown sugar, altho' the taste will differ slightly, Lord Ganesha will still bless you :)

      Coconut (grated) (fresh or frozen)  - 3/4 cup  (I'm blessed to get fresh coconut in Singapore)
      Cardamom powder - 1/4 tsp
      Ghee - 1 tsp

      Method :


      Add water to rice flour in the quantities specified and mix them without lumps. Then, stir it together on a kadai on medium flame until it solidifies. Add oil when it starts to become sticky.

      Allow it to cool down a bit and then make about 12 balls. Do apply oil to the palm of your hands (every now and then) so that the rice flour paste does not stick to your hands.


      Now let's make the poornam.
      Melt jaggery in a kadai with very little water.

      When it has almost melted and you can see it boiling, add grated coconut and stir well together. Add cardamom powder as well. Switch off the gas, once it comes together and all the water is absorbed.

      After this has cooled down a bit, divide this into 12 balls of size smaller than the rice flour balls (bcoz these go inside the rice flour ball).


      Flatten a white ball (rice flour ball) in the palm of your hand, keep the poornam/ sweet filling inside and then gently cover it with the white layer. Remove the excess white flour paste.This is an important step in the process of making modak and requires some practice. Make sure there isn't too much empty space between the filling and the outer covering. Also, do not expose the porrnam, else it will leak upon steaming and the shape of the modak may not be maintained! :(


      Repeat the same steps for all the 12 modaks.

      Take your steamer plate (I use my idli plates), grease with a little oil and then place the modaks carefully.

      Steam-cook for about 15 minutes. By then, you can smell the modaks already :)
      Modaks, hot and fresh from the steamer


      Note : If you're using a pressure-cooker, do not use the whistle.


      The modaks are now ready to offer to Lord Ganesha. May the Lord bless us all with happiness, good health and prosperity :)


      LinkWithin

      Related Posts Plugin for WordPress, Blogger...