Showing posts with label kids. Show all posts

Tuesday, May 26, 2015

Low fat Fruit and Nut Cake ~ Christmas Cake - Butter-free, Eggless cake :-)

Nowadays, I am inclined towards fat-free baking. True, we cannot avoid sugar in cakes, but we can minimize them by adding natural sources of sweetness. What do we do for butter? Substitute with natural sources of fat, that are good for your heart.


Guilt-free Fruit & Nut Cake 


Here's my Low fat Fruit & Nut cake that absolutely delicious and nobody can tell its butter -free or has no plain flour.


I've adapted the recipe from maria's menu but made it healthier by using Avocados and 100% whole wheat flour in place of Maida / All purpose flour/Plain flour. Read on ...

Ingredients:


2 Avocados - ripe (dark green in color)
Whole wheat flour - 1.5 cups
Brown sugar - 1 cup
Dry fruits (like raisins, tutty fruity, apricots, figs, ) +
Nuts (I used chopped almonds and cashews) = totally 1 and 1/2 to 1 and 3/4 cups roughly
Fruit juice (I have tried both Apple juice and Cranberry juice with good success)
Hot milk - 1/4 cup
Yogurt - 1/2 cup
Vanilla essence - 1 tsp

Baking powder - 0.5 tsp
Baking soda- 0.5 tsp
Cardamom powder - 1 tsp
Cinnamon powder - 0.5 tsp
A pinch of salt


Preparation -


  • Soak the dry fruits in the fruit juice overnight.
  • Drain the juice( save it so you can drink later!) and take  the soaked fruits and nuts in a bowl.
  • Coat it with 2 tbsp of flour roughly.


  • Start by pre-heating your oven to 180 degrees.
  • Sieve the flour along with a pinch of salt and baking soda, baking powder --> all dry ingredients. Add cardamom and cinnamon powder.
  • Beat the avocados (pitted) with sugar in a mixie.


  • Add hot milk to yogurt and mix this to the avocado-sugar mixture. Sure, the batter appears curdled at this stage but fret not!
  • Add vanilla essence as well.
  • Slowly mix the sieved flour mixture into the wet batter mixture until well-incorporated. You can add more chopped nuts at the stage. I like to add some walnuts :-)


Batter ready to go into the oven! 

  • Prepare a pan by lining with baking paper. Pour the batter and let the oven do the magic :-)

  • Do check after 20 minutes using a toothpick to see if the cake is done/ nearing doneness. If its too wet, let bake for another 5 to 10 minutes. Adjust timing by checking every 5 to 7 minutes. If the top is brown but the insides are uncooked/wet, then cover with an aluminum foil so that the top doesn't get burnt.


Just out of the oven! Heavenly goodness!

Enjoy your cake guilt-free :-)

This is suitable even for heart patients as there is no butter or oil added.

This year (26th Dec 2015), I made this lovely cake again for a potluck party and it was a big hit!!
Some photos -
Christmas Cake

Shopped for dry fruits and nuts and candied fruits :-)


Saturday, July 6, 2013

Mango Shrikhand - Creamy Sweet Mango Yogurt with crunchy nuts :-)

The Mango season is about to be over and now I rush to the Indian store to grab a few and make some Mango specialties :-)  I have been thinking of making Shrikhand at home ever since I shortlisted it as a fat-free recipe (basically if u make yogurt with fat-free milk, that is :P)  Finally, got around to make this delicacy for my hubby who said it's equivalent to Meiji/Marigold Mango yogurt :-) That's a compliment, I suppose! :-)

Mango Shrikhand

Yield - 4 ramekins (as in the picture)

What You Need-


Ripe Mango - 1 (medium size)
Fresh Yogurt/ Curd - 1 litre
Sugar - 3 to 4 tbsp (adjust according to the sweetness you prefer)
Cardamom powder - 1/4 tsp
Nuts of your choice - I used Almonds and Cashews

Mango Shrikhand

Procedure -


1. Make Greek Yogurt following the procedure here. This takes 6-8 hours in the fridge. But you don't have to do much actively!
2. Blend mango in a mixer and get the puree.
3. Powder sugar.
4. Mix in powdered sugar, cardamom powder and the mango puree into Greek Yogurt and whisk them all together until you get a smooth texture. This is reallly important.
5. Chop some nuts and mix them too. Almonds would need to be blanched. Pistachios would be awesome, but I didn't have any yesterday. Reserve some nuts to garnish on top later.
6. Pour into ramekins or ice-cream cups and decorate with nuts. Refrigerate for another 3 hours to let it set well.
7. Serve chilled.

Simply awesome! Don't go by my words, try for yourself :-)

Umm...Slurp!


Friday, October 19, 2012

Semiya Payasam - Vermicelli Kheer - Festive Recipes

Semiya Payasam is super-quick to make and hence, this post will be a short one as well :-) My sis loves Semiya Payasam always and I totally licked the cup clean this time when amma made it during Navartri. She never adds Condensed milk to any Kheer she makes, as it's high in calories and definitely unhealthy. Yet her payasam was yum-yum-yummy and I asked her if she did the Pressure-cooker method that she taught me to get the perfect Pal Payasam easily everytime.  No, no pressure-cooker needed for Semiya Payasam, all you need is a pot to boil milk and water. Here's how :-

Semiya Payasam / Vermicelli Kheer


What Amma Uses -

  • Semiya / Vermicelli - 1 cup
  • Milk - 1 and 1/2 cups
  • Water - 2 and 1/2 cups
  • Cardamom powder - 1/2 tsp
  • Nutmeg powder (jadikkai) - 1/4 tsp
  • Sugar - 2/3 cup (Use 1/2 cup if you prefer slightly lesser sweetness)
  • About 12-15 Raisins roasted in 1/2 tsp Ghee

How She Makes the Yummy Kheer -

  1. Boil water in a pot and when ready, add the semiya/vermicelli to the boiling hot water and let cook. There will still be water remaining after vermicelli has cooked well. Don't fret.
  2. Boil about 2 cups of milk in a pot or milk cooker (follow your usual method;  in Singapore, I would just microwave milk for 3-4 minutes, thats it) and keep aside.
  3. Add sugar and cardamom + nutmeg powder to the cooked semiya/vermicelli. Stir gently to uniformly mix. Keep on sim/low flame for 5-7 minutes.
  4. Take cooked vermicelli off the stove and pour 1 cup milk first.  Add the roasted raisins. Voila! :-) Tasty Semiya Payasam is ready for neivedhyam! :-) Add another 1/2 cup milk later, just before serving.

Notes :


  • Never ever boil milk and sugar together, it would get spoilt easily.
  • This payasam tastes awesome both warm and cold. 
  • Ratio of vermicelli to water is 1: 2.5 and you can start with equal quantity of milk (as that of vermicelli) to begin with and then add some more milk as required.
  • Add some more milk (boiled and cooled) if all the milk gets absorbed over time.

Semiya Payasam/ Vermicelli Kheer


Here are other yummy Kheer / Payasam Recipes for Navaratri and other festivals -

Click on the pictures to read the entire recipe.

Palada/ Rice Ada Payasam - Famous in Kerala 


Palada Payasam / Rice Ada Kheer


Aval Payasam - Kheer with Poha/ Flattened Rice 


Aval Payasam / Kheer with Poha/ Flattened Rice


Carrot Kheer - Yummy Dessert drink full of goodness of carrots!


Carrot Kheer/ Payasam


Bring on the festive spirit! :-)


Sunday, October 14, 2012

Badam Ladoo/ Laddu - No sugar or ghee added! - 5 Minute Recipe!

You can make Badam Laddu without sugar (in fact no extra sweetener added) or ghee! Did you know that? Well, I didn't know it too, until a good friend of mine, Karpagam aunty told me the secret! She let me taste the laddu first and then told me that it's a single ingredient sweet!!! I couldn't believe it! Absolutely yummy and so easy to make!

So full of nutrition (good cholesterol), it is great for both kids and adults alike to eat a laddu a day! :-) This is an easy, healthy and a really quick recipe :-) What are you waiting for!!


What You Need -


A cup of badam or raw almonds

That's it!!! :-) No, I'm not joking :-)


How To -


  • Spread the raw almonds on a microwaveable plate and microwave for 2-3 minutes. The heat helps to release the natural oils in them. Alternatively you can toast them on a tawa too, but be careful not to burn them.
  • Let cool.
  • Take your mixer (the one in which you powder dry ingredients) or coffee grinder and powder the almonds. don't bother if it's a bit coarse! That will add some crunch too!
  • Transfer to a wide plate and make them into small round balls (typical size of laddu you would make). You don't need to add ghee for binding, they come together easily with the inherent oil in them. Be patient, you have to hold each laddu tightly for a good 30 seconds to 1 minute to help them keep the shape.

Enjoy!!!


Notes -


  • You may add a teaspoon of warm milk to bind, but that would lessen the shelf life a lot - you can't keep for more than 2 days! 
  •  With 150 to 180 grams of almonds, I got about 10 laddus.  I had opened the pack earlier and used for making something else (or just gobbled up a few plain!) so I had less than 200 grams for preparing these laddus.
  • If you still don't trust my words, make just 1 laddu and taste it and check for yourself if the sweetness level is sufficient. If really required, powder 2 tbsp of sugar and heat & add 2 tsp of ghee to suit your tastebuds.

What healthy recipe did you recently experiment on and were satisfied with? Please share with me! :-)


Thursday, October 11, 2012

Peda using Gulab Jamun Mix - Super Quick Sweet in 3 minutes!

So, I had a packet of MTR Gulab Jamun Mix sitting in my pantry and about to expire in a month's time. I definitely did not want to make them into jamuns...deep frying plus lots of sugar in the syrup...strictly prohibited, given the rate at which I am gaining weight nowadays. I looked at what went into the Jamun Mix and had to think hard looking at the ingredients' list. Obviously, sugar was out of the equation, so I thought of jaggery spontaneously.  I decided to make jaggery syrup and mix in this powder but that turned out to be not-so-good. Figured out it needed some diary products (too much of wheat cream doesn't taste good), so I made jaggery syrup with milk (and not water) and also added some milk powder along with the Gulab Jamun mix. Parfait!


What I Used -


100 g of MTR Gulab Jamun Mix
50 g of Nestle Instant Milk powder
3 tbsp of jaggery
2 tbsp of milk
2 pinches of cardamom powder
2-3 pistachios - to garnish
a few drops of oil - to bring everything together and make into pedas.

How I Made These Cute Pedas -

  1. Added jaggery and milk to a microwave-safe bowl and microwaved for 2 minutes.
  2. Once syrupy, added the Gulab Jamun mix powder and the Milk powder, along with cardamom powder.
  3. Used my hand (clean!) to bring everything together. Had to sprinkle a teaspoon or two of milk powder additionally since it was a bit too sticky.
  4. Finally, brought the whole mass into a rather tough dough after greasing my palms with oil.
  5. Divided the dough into 6, shaped them into balls first and then flattened into pedas.
  6. Decorated by pressing the center a bit and filling with crushed pistachios!
  7. Keep them refrigerated and Microwave each peda for 30-40 seconds just before serving.
Voila!


When I showed this to my dad, he asked me if I bought them from Sri Krishna Sweets! Isn't that enough? :-)

Make these pedas and show off to your friends and family and let them marvel at your culinary skills and creativity! Enjoy :-)


Notes:


  • Shred and Use Paneer in place of milk powder for enhanced taste
  • Replace jaggery with sugar (brown or white) for a different flavor.
  • Since we add fresh milk to this, finish consuming the pedas within a day or two! (As if this has been a problem anytime! :D)
  • Microwave times vary with the power of your microwave, so adjust accordingly. Mine is a 1000 W oven. 
  • I got 6 pedas (as in the picture) with the above quantities. 


Saturday, March 3, 2012

Low-fat, No-bake Chocolate Mousse! Within 10 minutes!

Wondering how chocolate mousse can be low in fat and yet delicious? Yes, there's no cream nor egg yolks but there's tofu....Silken Tofu...Extra smooth... :-) It's unbelievably quick to make for that lingering taste it leaves behind! And....there's no baking involved at all!

Creamy Chocolate Mousse - without any cream! ;)


Do not deprive yourself of this opportunity that could turn even tofu-detesters to fall in love with this Tofu-Chocolate marriage! Yes, Tofu is so bland that makes it so versatile, it absorbs whatever you add/ blend with it. I learnt about Tofu after coming to Singapore as it's widely used in Asian cuisine.  Tofu is made from soybeans/ soy milk just like how Paneer is made from Milk. Isn't it nice to get some extra protein even as we consume desserts? :-)

Chocolate Mousse - Low-fat!


Yield - 4 medium-sized ramekins

What I Used -

Simple Ingredients, right in your pantry!

  • Extra smooth Silken Tofu - 300 g
  • Pure Cocoa Powder (don't use drinking chocolate) - 3 tbsp
  • Chocolate Chips (Semi-sweet works best) or Dark chocolate (I used 53%) bars* ~ 100 g
  • Milk - 1/4 cup
  • Vanilla extract - 1 tsp

* There's no need to add extra sugar as the sugar present in Chocolate bars/chips was found to be sufficient. However, if you think your family doesn't like Dark chocolate as such (if they call it bitter!) , then, may be you should try using Milk chocolate instead. Best to start with a combination of milk and dark - 50% each!


How To -


1. Drain the water from tofu and blend into a really smooooth paste in an electric mixer/blender.
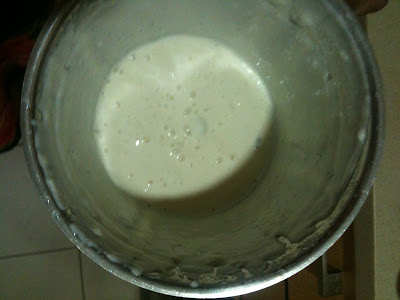
Siken Tofu, blended smooth


2. Microwave milk for a minute and add cocoa powder to hot milk. Whisk them well together without lumps.

3. Microwave chocolate chips or chocolate bars until it's all melted.

4. Add 2 + 3 + vanilla to the smoothly blended tofu and run the electric mixer again.

5. Pour into serving cups (I used colorful ramekins!) and refrigerate (do NOT freeze)  for about 2 hours. The more time you let it sit in the fridge, the better it gets!


6. Optionally, grate some dark chocolate onto each cup and serve chilled.

Let me tell you that it may not taste good if you lick off a spoon BEFORE refrigerating it. But AFTER 90 minutes (yes, I secretly tasted a spoonful after 1 and half hours!), you're transported to heaven! Absolutely like the Before-After pictures that Slimming companies, Hairloss treatments and the like advertise with! :D

Nobody can tell there's tofu in the mousse! That's the beauty! :-)

Rich n decadent choc mousse
C'mon, make it NOW and surprise your family!!!

Smoooth...


Tuesday, February 14, 2012

Quinoa Salad - Quick, healthy and fulfilling breakfast/supper


What's Quinoa ?


Quinoa (pronounced "keen-wah") is a grain-like crop grown for its edible seeds. It's a highly nutritious carbohydrate, that helps you to stay lean as well as maximize your energy levels at the same time. Its nutritional profile is similar to that of brown rice, but quinoa is higher in protein. Quinoa is great for cardio-vascular health, boosts your anti-oxidant levels, reduces the risk of gallstones, full of fiber and could help lower migraine. It's gluten-free and cholesterol-free! Most importantly, it's delicious!


How to cook Quinoa ?


First, it is essential to rinse quinoa atleast 3 times by changing water, in order to get rid of the bitter taste from the saponin coating. It's cooked much like rice, with twice the volume of water (or slightly less). It can be cooked in a closed pan or a rice cooker or a microwave. When cooked, quinoa is fluffy, crunchy and a little creamy!


Here's a simple salad with veggies, fruits and nuts added to cooked quinoa. This is one of the quick ones I make whenever I want to stay away from Indian masalas, yet eat something tasty. Feel free to add or deduct veggies, fruits and nuts to suit your family's taste buds! :-)


Nutritious & delicious Quinoa salad - So easy to make!


Yield - 2 people


Prep time + cooking time - 25 mins


What I Used for the Salad-


Quinoa - 1 cup (rinsed)
Water - 1 and 3/4 cup
Olive Oil - 1 tsp


Onions - 2 (chopped)
Garlic -  4 pods, finely chopped
Carrot - 2 medium (cubed)
Cucumber - 1 (chopped)
Tomatoes - 3 (chopped)
Fresh Coriander leaves - a small bunch, finely chopped


Apple - 2, cubed
Raisins - about 50 grams
Cashewnuts - a handful
Hazelnuts - 2 handfuls

Salt - to taste
Pepper - 1 tsp
Asafoetida - 2 drizzles

Add ons :

Pine nuts - toasted
Peanuts - roasted
Strawberries - fresh!
Feta cheese! 


How To -

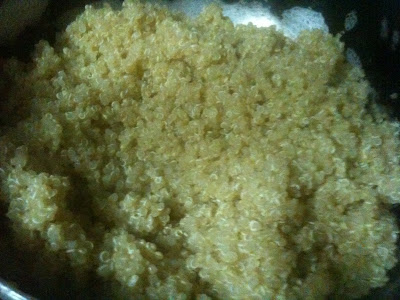
  • Boil water with a drop of oil in a pan. Meanwhile, rinse quinoa about 3 times to get rid of the foamy saponins. This step is important, else you'll end up with bitter-tasting quinoa. Add rinsed quinoa to boiled water and close the pan. In 12 to 15 minutes, it's fully cooked (all the water is absorbed) and looks fluffy with thin white rings around. Let the cooked quinoa cool for atleast 10 minutes.
 

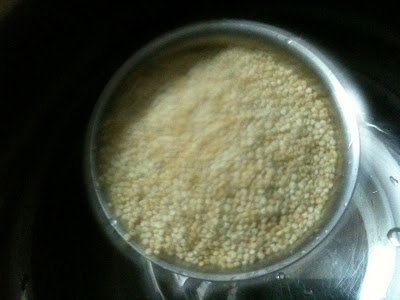
Quinoa, rinsed with water


Cooked quinoa


  • Heat about 1 tsp of olive oil and fry garlic and onions slightly. Don't brown them. 

  • Toast the nuts on an oven or a tava without any oil.

  • Peel the veggies and chop them ready. Cube apples.

  • Take a big salad bowl, add the slightly fried onions, garlic and all the chopped veggies, apples, nuts, raisins and sprinkle required salt, pepper and a little asafoetida. Toss everything gently. Squeeze some lemon juice if desired.


Healthy n tasty Quinoa salad

Enjoy this sumptuous salad for breakfast or dinner!


Wednesday, January 11, 2012

Maddur Vada - Karnataka specialty

Maddur Vade/Vada is a popular Karnataka specialty and you'd have definitely had it if you have ever been on the Bangalore-Mysore train route. This one is a crispy crunchy snack that adults and kids alike will love to munch on! I had the opportunity to discover Kalyani's blog as part of my participation in Blog Hop Wednesdays event. I picked this recipe as I wanted to try a dish unique to a particular region. Kalyani has a beautiful blog with diverse recipes and tempting food pictures and I found her stories prior to every recipe to be very interesting!

I made Maddur Vade in about 30 minutes and it was finger-lickin' good! :)

Maddur Vade

You 'll Need -

Maida - 1 cup
Semolina / Rawa - 1/2 cup
Rice flour - 2 tbsp
Onion, finely chopped - 1/2 cup
Fresh coriander and some curry leaves, chopped  - 1/4 cup
Green chillies-  2 nos (or adjust to suit your taste)
Salt - to taste
Hot oil - 1/4 cup (to make the dough)
Water (preferably warm)- 2 tbsp (approx) - to make the dough
Some more oil - to deep fry the vadas


How To -

  • Mix Maida, rawa and rice flour together in a bowl. Add chopped onions and salt and sprinkle little water to get some moisture. 
  • After 5 mins, add chopped coriander, curry leaves, green chillies and pour hot oil and mix well to get a soft, pliable dough. Be careful and DONT use your hand because its HOT OIL (I burnt my fingers the first time I made Maa Laadu and learnt the lesson!) Use a stainless steel spoon instead!
  •  Add warm water, a few drops at a time to get the dough done. Let sit for 10 minutes.
  •  Grease your hands with oil (or use a baking sheet as suggested by Kalyani) and flatten a small ball (roughly of 1 inch diameter or slightly more) of the dough and make a disc (approx 3 inch dia).
  • This is now ready to be deep-fried in pre-heated oil and then the Vada is ready to be devoured!

Simply use your palm! That's mehendi design on my hands, btw!
  • Repeat the same step of making (kinda thick) discs with the dough and deep fry in batches of 2 or 3 depending on the capacity of your frying pan. I could fry just one at a time, as I used very little oil and the smallest pan I had (this is to reduce left-over oil that remains to be re-used!)
    • Check for temperature of oil before frying, by dropping 1/2 tsp of mustard or jeera into it; they should pop up and sizzle. If the oil is not hot enough, the vadas will absorb more oil than necessary and will be soggy! 
    • Keep in medium flame and fry the vadas, to ensure the dough gets cooked sufficiently. High flame will blacken the outside and leave the inside uncooked!
    • Flip sides when it turns slightly golden colored and let the other side get crisp.


  • Drain excess oil on kitchen tissues and enjoy these lovely Maddur Vadas with a cuppa hot masala chai! :-)


Crispy Maddur Vadas
Crispy Maddur Vadas on their way to BHW event!


And to MidWeek Fiesta @FoodCorner


LinkWithin

Related Posts Plugin for WordPress, Blogger...