Showing posts with label fruits. Show all posts

Tuesday, May 26, 2015

Low fat Fruit and Nut Cake ~ Christmas Cake - Butter-free, Eggless cake :-)

Nowadays, I am inclined towards fat-free baking. True, we cannot avoid sugar in cakes, but we can minimize them by adding natural sources of sweetness. What do we do for butter? Substitute with natural sources of fat, that are good for your heart.


Guilt-free Fruit & Nut Cake 


Here's my Low fat Fruit & Nut cake that absolutely delicious and nobody can tell its butter -free or has no plain flour.


I've adapted the recipe from maria's menu but made it healthier by using Avocados and 100% whole wheat flour in place of Maida / All purpose flour/Plain flour. Read on ...

Ingredients:


2 Avocados - ripe (dark green in color)
Whole wheat flour - 1.5 cups
Brown sugar - 1 cup
Dry fruits (like raisins, tutty fruity, apricots, figs, ) +
Nuts (I used chopped almonds and cashews) = totally 1 and 1/2 to 1 and 3/4 cups roughly
Fruit juice (I have tried both Apple juice and Cranberry juice with good success)
Hot milk - 1/4 cup
Yogurt - 1/2 cup
Vanilla essence - 1 tsp

Baking powder - 0.5 tsp
Baking soda- 0.5 tsp
Cardamom powder - 1 tsp
Cinnamon powder - 0.5 tsp
A pinch of salt


Preparation -


  • Soak the dry fruits in the fruit juice overnight.
  • Drain the juice( save it so you can drink later!) and take  the soaked fruits and nuts in a bowl.
  • Coat it with 2 tbsp of flour roughly.


  • Start by pre-heating your oven to 180 degrees.
  • Sieve the flour along with a pinch of salt and baking soda, baking powder --> all dry ingredients. Add cardamom and cinnamon powder.
  • Beat the avocados (pitted) with sugar in a mixie.


  • Add hot milk to yogurt and mix this to the avocado-sugar mixture. Sure, the batter appears curdled at this stage but fret not!
  • Add vanilla essence as well.
  • Slowly mix the sieved flour mixture into the wet batter mixture until well-incorporated. You can add more chopped nuts at the stage. I like to add some walnuts :-)


Batter ready to go into the oven! 

  • Prepare a pan by lining with baking paper. Pour the batter and let the oven do the magic :-)

  • Do check after 20 minutes using a toothpick to see if the cake is done/ nearing doneness. If its too wet, let bake for another 5 to 10 minutes. Adjust timing by checking every 5 to 7 minutes. If the top is brown but the insides are uncooked/wet, then cover with an aluminum foil so that the top doesn't get burnt.


Just out of the oven! Heavenly goodness!

Enjoy your cake guilt-free :-)

This is suitable even for heart patients as there is no butter or oil added.

This year (26th Dec 2015), I made this lovely cake again for a potluck party and it was a big hit!!
Some photos -
Christmas Cake

Shopped for dry fruits and nuts and candied fruits :-)


Saturday, July 6, 2013

Mango Shrikhand - Creamy Sweet Mango Yogurt with crunchy nuts :-)

The Mango season is about to be over and now I rush to the Indian store to grab a few and make some Mango specialties :-)  I have been thinking of making Shrikhand at home ever since I shortlisted it as a fat-free recipe (basically if u make yogurt with fat-free milk, that is :P)  Finally, got around to make this delicacy for my hubby who said it's equivalent to Meiji/Marigold Mango yogurt :-) That's a compliment, I suppose! :-)

Mango Shrikhand

Yield - 4 ramekins (as in the picture)

What You Need-


Ripe Mango - 1 (medium size)
Fresh Yogurt/ Curd - 1 litre
Sugar - 3 to 4 tbsp (adjust according to the sweetness you prefer)
Cardamom powder - 1/4 tsp
Nuts of your choice - I used Almonds and Cashews

Mango Shrikhand

Procedure -


1. Make Greek Yogurt following the procedure here. This takes 6-8 hours in the fridge. But you don't have to do much actively!
2. Blend mango in a mixer and get the puree.
3. Powder sugar.
4. Mix in powdered sugar, cardamom powder and the mango puree into Greek Yogurt and whisk them all together until you get a smooth texture. This is reallly important.
5. Chop some nuts and mix them too. Almonds would need to be blanched. Pistachios would be awesome, but I didn't have any yesterday. Reserve some nuts to garnish on top later.
6. Pour into ramekins or ice-cream cups and decorate with nuts. Refrigerate for another 3 hours to let it set well.
7. Serve chilled.

Simply awesome! Don't go by my words, try for yourself :-)

Umm...Slurp!


Tuesday, October 16, 2012

(Red) Banana Halwa - Chev vazhai pazha Halwa

Step out of Palakkad (Palghat) station and all you can see is shop after shop, tempting you with different varieties of Halwas (or Haluwa! as they call it) and Chips. Vibrant colors and the rich aroma of ghee - ummm :-)  They make a good combination too - halwa for sweet and chips for something savory.  We always bring back freshly-made Halwa and Chips (especially love the sweet banana chips ;-)) whenever we visit Palakkad.

Bananas and Halwa go hand-in-hand  - both are gooey substances and since bananas are so sweet themselves, we can cut down on the added sugar and still have a great-tasting sweet! In addition, this doesn't take more than 25 minutes (end-to-end) on stove-top and it just tasted awesome even with the minimum amount of ghee I used :-)  I'm very happy with the results and so were my guests!


I didn't plan to use Chev vazhais (Chivappu means Red in Tamil, Chev is derived from it) specifically but I was ecstatic when I spotted them in Bukit Gombak market one day! You can use any bananas to make this Halwa!


Ingredients -


Ripe bananas - 5
Sugar - 80 ml
Ghee - 3 tsp
Cardamom powder - 1 tsp
Cashews - about 12


Method -


  • Peel and mash bananas with a potato masher.

  • In a kadai, heat 1 tsp of ghee and roast cashewnuts. Keep aside. 

  • Add another tsp of ghee and add the banana puree.

  • Stir well for about 12-15 minutes. Take care to ensure that it doesn't stick to the bottom of your kadai/pan.
  • Add 1 tsp of ghee and add all the sugar and mix well with the banana mixture in the kadai.
  • Wait until the banana puree changes to a brown color (பழுப்பு நிறம்). By this time, the whole mixture comes together so well into a mass (see pic below). The glossy effect is due to the caramelization of sugar (we haven't added much ghee, remember?)

  • Reduce the flame and sprinkle cardamom powder.
  • Add ghee-roasted cashewnuts and mix for a minute.
  • Spread on a greased plate and make squares on cooling. 

Yield - I got about six, rather big 2 inch-by-2 inch halwa pieces.


Tuesday, February 14, 2012

Quinoa Salad - Quick, healthy and fulfilling breakfast/supper


What's Quinoa ?


Quinoa (pronounced "keen-wah") is a grain-like crop grown for its edible seeds. It's a highly nutritious carbohydrate, that helps you to stay lean as well as maximize your energy levels at the same time. Its nutritional profile is similar to that of brown rice, but quinoa is higher in protein. Quinoa is great for cardio-vascular health, boosts your anti-oxidant levels, reduces the risk of gallstones, full of fiber and could help lower migraine. It's gluten-free and cholesterol-free! Most importantly, it's delicious!


How to cook Quinoa ?


First, it is essential to rinse quinoa atleast 3 times by changing water, in order to get rid of the bitter taste from the saponin coating. It's cooked much like rice, with twice the volume of water (or slightly less). It can be cooked in a closed pan or a rice cooker or a microwave. When cooked, quinoa is fluffy, crunchy and a little creamy!


Here's a simple salad with veggies, fruits and nuts added to cooked quinoa. This is one of the quick ones I make whenever I want to stay away from Indian masalas, yet eat something tasty. Feel free to add or deduct veggies, fruits and nuts to suit your family's taste buds! :-)


Nutritious & delicious Quinoa salad - So easy to make!


Yield - 2 people


Prep time + cooking time - 25 mins


What I Used for the Salad-


Quinoa - 1 cup (rinsed)
Water - 1 and 3/4 cup
Olive Oil - 1 tsp


Onions - 2 (chopped)
Garlic -  4 pods, finely chopped
Carrot - 2 medium (cubed)
Cucumber - 1 (chopped)
Tomatoes - 3 (chopped)
Fresh Coriander leaves - a small bunch, finely chopped


Apple - 2, cubed
Raisins - about 50 grams
Cashewnuts - a handful
Hazelnuts - 2 handfuls

Salt - to taste
Pepper - 1 tsp
Asafoetida - 2 drizzles

Add ons :

Pine nuts - toasted
Peanuts - roasted
Strawberries - fresh!
Feta cheese! 


How To -

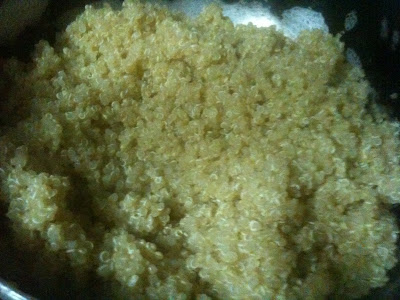
  • Boil water with a drop of oil in a pan. Meanwhile, rinse quinoa about 3 times to get rid of the foamy saponins. This step is important, else you'll end up with bitter-tasting quinoa. Add rinsed quinoa to boiled water and close the pan. In 12 to 15 minutes, it's fully cooked (all the water is absorbed) and looks fluffy with thin white rings around. Let the cooked quinoa cool for atleast 10 minutes.
 

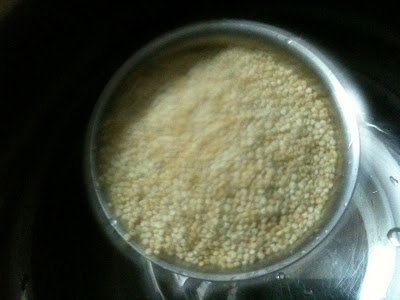
Quinoa, rinsed with water


Cooked quinoa


  • Heat about 1 tsp of olive oil and fry garlic and onions slightly. Don't brown them. 

  • Toast the nuts on an oven or a tava without any oil.

  • Peel the veggies and chop them ready. Cube apples.

  • Take a big salad bowl, add the slightly fried onions, garlic and all the chopped veggies, apples, nuts, raisins and sprinkle required salt, pepper and a little asafoetida. Toss everything gently. Squeeze some lemon juice if desired.


Healthy n tasty Quinoa salad

Enjoy this sumptuous salad for breakfast or dinner!


Sunday, January 1, 2012

Blueberry Streusel Cake - Happy New Year!!!

I'm really fond of fruits in my cake and the berries, full of anti-oxidants, are definitely special! As a child, I haven't seen Blueberries or Blackberries and was fascinated to see some fresh produce here in Singapore! We do get Strawberries in India from places like Reliance Fresh or Nilgiris Supermarket and whenever appa brings home these cute fruits, amma makes fresh smoothies that taste so heavenly!

I am immensely delighted that this is my 100th post (Yeh!!!) and today is the 1st day of 2012 :) This is Celebration time! I decided to splurge a bit today and baked this one, without substituting butter with anything else! I did feel a bit guilty on creating some exceptions, but I guess we really enjoyed every piece of the cake :)

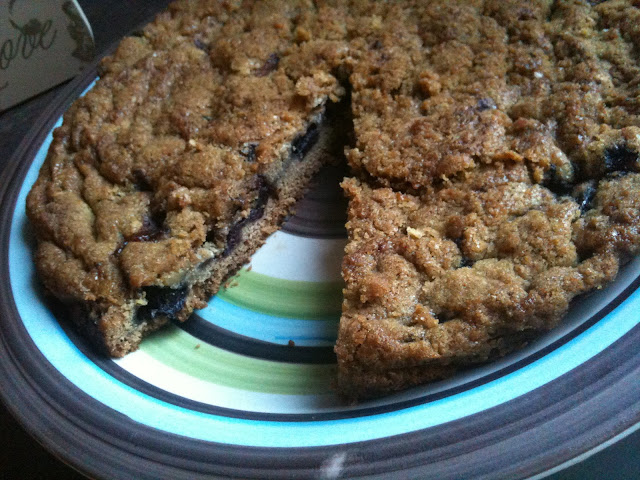
Blueberry Cake with Streusel Crumb Topping

The basic cake recipe is adapted from Joy of Baking, but the streusel topping is my own combination, with some oats and walnuts added for the crunch!

Blueberry Streusel Cake

What I Used for the Cake Batter -


Dry Ingredients -


All purpose flour - 1/2 cup
Whole wheat flour - 1/2 cup
Salt - 1/8th of a teaspoon
Baking powder - 1 tsp

Wet Ingredients -


Butter (unsalted) - 1/4 cup 
White Sugar - 1/2 cup
Flaxmeal - 1 tbsp soaked  3 tbsp of warm water for 5 minutes (or 1 egg)
Milk - 1/3 cup
Vanilla essence - 1/2 tsp
Blueberries - 350 grams

Blueberries - out of the freezer!

For the Streusel Topping -


All-purpose flour - 1/2 cup
Brown sugar - 1/2 cup
Cinnamon powder - 1 tsp
Walnuts (coarsely chopped) - about 10
Oats (Quick Cooking) - 1/4 cup
Butter - 3 tbsp


Steps -


To Make Streusel Topping -


Mix the flour, oats, cinnamon and sugar together. Cut in the butter with a fork and blend well until it forms coarse crumbs. Add chopped walnuts. This is the streusel topping. Keep it aside.

To Prepare the Cake Batter -


  • Sift the dry ingredients and mix them together.
  • Beat the butter until smooth and cream sugar along with it.
  • Whisk flaxmeal with warm water until it becomes sticky. Then, add it to the creamed butter-sugar mixture. Please look up this recipe for pictures of freshly ground flaxseeds and how it looks when whisked with warm water.
  • Add vanilla and beat until well-incorporated.

  • Now, add the flour mixture (dry) to the wet and add milk gradually and mix until just combined.
  • Take out your cake pan, grease with butter (or use a baking sheet as a liner) and pour this prepared batter on top of it.
  • Arrange blueberries on top of this batter.


  • Sprinkle the prepared streusel topping on top. Press slightly with a spatula.


Bake for 40 to 50 minutes until a toothpick inserted into the center of the cake, comes out clean, without anything sticking to it. Remove from the oven and let cool on the wire rack.


Blueberry Cake with Streusel Crumb Topping


The streusel crumb topping is the BEST part of this cake! It is ABSOLUTELY RICH with butter and sugar and the addition of oats and walnuts give it the much needed crunch :) I say, its so much better than cakes loaded with cream on top! Do try this and your taste buds will be soo pleased that you'll want to make it over and over again! :-)

Serve fresh out of the oven when it's still warm. Refrigerate the cake (if anything remains!) and it will stay good for a week.


Wishing everyone a fantastic new year filled with good health, joy and prosperity!!! :) 


Friday, November 25, 2011

Carrot & Pear Cake (Eggless and Vegan)

When I started baking, I had decided that I won't be using butter (and definitely not in cups and cups) in order to do good to myself, esp to feel good, when I stand in front of the mirror ;)  I also try to use whole wheat flour and avoid or atleast reduce the quantity of all-purpose flour/maida used. Wheat flour is bleached with a substance called Benzoyl peroxide (which is present in hair dyes and is banned in UK china and the European Union. OMG!!) to get white colored Maida. Source : Wikipedia

There are a lot of Carrot Cake recipes over the Web and sure, they all look delicious and tempting! This one caught my attention and I wanted to give it a try. The first time, I made these with an apple, as per the original recipe, just eggless. Simply delicious! Now, I had some pears in my fridge and I thought a pear can be substituted in place of an apple! Sure, they work great!  They are similarly textured and is almost of the same size. I also inserted some walnuts (but of course;) - you can add any nuts - pistachios, pecans or use 1/2 raisins and 1/2 nuts - entirely upto you!

Perfectly moist and full of carrots, this one is a healthy cake that also tastes super-yummy! :) Don't blame me if this cake becomes your tea-time obsession! :)

Carrot and Pear Cake

With the classic CreamCheese frosting!


I Used -

Carrots and Pear

1 cup  Whole-Wheat Pastry flour
1/2 cup Brown Sugar
1/2 cup White Sugar
2 tbsp Flax seeds, freshly ground
6 tbsp Warm Water
1/4 cup Olive Oil
1/4 cup Prune Extract (Or Use another 1/4 cup Oil or 1/4 cup Applesauce)
1/2 tsp Baking Soda.
1/4 tsp salt
1 tsp All-spice powder (use cardamom powder if you don't have all-spice)
2 medium carrots , peeled and grated (amounting to 1 and 1/2 cups)
1 medium pear (peeled and cut into small cubes)
Walnuts - about 8 nos.

Whole Wheat flour


How To -


Preparatory Steps -

  1. Grate Carrots
  2. Cut Pear or Apple
  3. Soak groound Flaxseeds in warm water for 5 minutes then whisk)
  4. Start pre-heating the oven to 180 deg Celcius


Procedure -


  • Combine flaxmeal,  oil, prune extract and the sugars until a bit creamy.
Ground flax seeds

It becomes a bit frothy after whisking with warm water

  • In another bowl, sift the flour, baking soda, salt and all-spice powder.
  • Gradually add to the wet mixture until just combined.
  • Fold in carrots and pear.
  • Mix in coarsely chopped walnuts.
  • Grease a square baking pan with oil or butter (if you don't mind!) and spoon the batter and level it.

Ready to go into the oven

  • Bake at 180 degree Celsius for about 30 minutes or until a toothpick inserted in the center of the cake, comes out clean.

Just out of the oven!

Cooled and turned upside down
Close-up!

  • Let cool and then make pieces.
  • Enjoy as such with a cuppa chai tea, like I did! :)

When you serve to guests, you could make a quick frosting with cheese cake, to make it decadent! You could place a walnut on top of each piece for decoration.

Carrot and Pear Cake with Cream Cheese Frosting


(To make the frosting, I used equal quantities of cream cheese and sugar, 1/4th of that quantity of butter and a few drops of vanilla - whisk them all together until and creamy and well-incorporated...Ummmm....:)

Notes:


  • Do not add more water than the prescribed ground flaxseed-to-water proportion (1 tbsp flax to 3 tbsp warm water). The end result will be sticky dough-like cake and longer hours of baking.The first time, I used flaxseeds, I added extra water and learnt this lesson the hard way! 

  • While grating carrots and particularly, apple or pear, strain extra juice if there's too much and do not add all the juice to the cake. For this reason, I prefer chopping pear or apple into small pieces (in lieu of grating). Best to not grate carrots fine (Use the bigger grater). This is to prevent the cake from turning overly moist.

This is on the way to Bake Fest @ Zesty Palette


and to Khushi's Bake With Your Heart even.

I'm very happy to send this cake to Christmas Party @ Julie's space - Erivum Puliyum


Saturday, November 12, 2011

Marbled Choco-Banana Cake (Eggless)

I have always been marveling at marble cakes and their patterns! Now, having tried for myself, I know its so simple ;)

Marble Cake!


I have been awaiting to enjoy home-baked stuff for our weekend breakfasts. There is definitely a special flavor that gets added and makes home-made stuff tastier - probably all the care and anxiousness (for success of a new recipe!) and of course, it's made with lots of love! :)

Bananas cakes never fail me and this one was no exception! Even better, since it has chocolate as well - sumptuous 2-in-1 cake, isn't it?


Marble Chocolate-Banana Loaf Cake


Recipe Adapted From : Cooking Light Magazine, Sept 2003


You Need -


  • All-purpose flour / Maida - 2 cups
  • Baking soda - 3/4 tsp
  • Salt - 2 pinches
  • Bananas (medium sized) - 4
  • Sugar - 1 cup  
    • I think this can be reduced to 3/4 cup, it's sweet, even for a sweet-toothed person like me
    • A better judgement would be to taste the sweetness of the bananas and then decide :) This bulb did not glow earlier when I made it! Anyways, next time :)
  • Butter - 1/4 cup, softened  
    • Bring to room temperature
  • Yogurt (plain, unsweetened) - 1/3 cup  
    • Home-made yogurt/curd works great!
    • Low-fat works too!
  • Semi-sweet chocolate chips - 1/2 cup

How To -


  • Sieve the flour, baking soda and salt together.

  • Cream butter and sugar and then add mashed bananas to the mixture. Use an electric mixer/blender and make into a puree.

  • Add yogurt next and blend again.

  • Stir in the flour mixture and beat at low speed. That's our banana batter.

  • For the chocolate batter, microwave choc-chips for 2 minutes. By now, it's melted. Stir until smooth. Combine 1 cup of banana batter with the melted choc-chips and blend well. Our chocolate batter is ready!

Banana batter ready to be combined with melted choc chips

  • Line your baking tray (I used my loaf pan) and then pour chocolate batter alternately with banana. To marble-ize the cake, swirl around with a knife through both colors of batter. The secret is out! :D

Ready to get baked!


  • Bake in a pre-heated oven at 180 deg C for about 80 minutes...yes, you have to wait quite long! The aroma is just amazing as it gets baked :) A clean bamboo skewer test tells us it's done.  Let cool for 10 minutes in the pan; then remove from pan and let cool completely on the rack.


I like to enjoy these slices as such, or as a sandwich with cream cheese in between! ;)
I can hear you laughing at me ~whats the point in eating brown rice! :)


We enjoyed this with a glass of fresh home-made Minty Mango Smoothie :)  That was a good breakfast!

Sending this to Khushi's event - Bake with your heart and to Vardhini's Bake Fest @Zesty Palette 


LinkWithin

Related Posts Plugin for WordPress, Blogger...